Thank you for contacting The Fair Price Shop.


The instructions are as follows : 


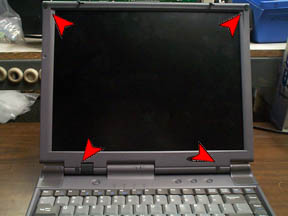
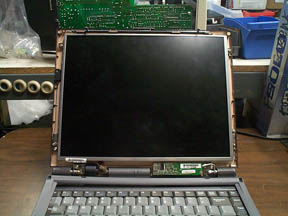
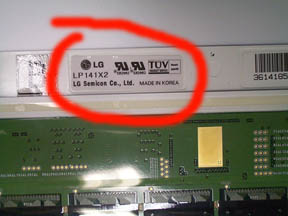
Near the all 4 corners of your laptop upper bezel, you will find soft rubbers, removing them you will see four screws, just open them and remove the frame by separating as it is attached with clips. You can open it by just pulling softly the frame from front and back sides through all four corners. Now when you have opened the frame just see at the bottom right backside of the LCD. there will be a sticker showing the manufacturer name and part no., just note it down. Send this no. to me and i will send you that LCD or the quotation. 


Detailed instructions :


The directions below are for example only and do not pertain to any particular laptop brand. All laptops will vary slightly, but are generally assembled the same way. Please take your time, there is no hurry.


1. Remove the screw covers from the front
bezel of the LCD display (usually rubber)

2. Remove the screws. Once the bottom screws are removed, try not to fold the cover open or closed as the stiffness of the LCD housing has been weakened.


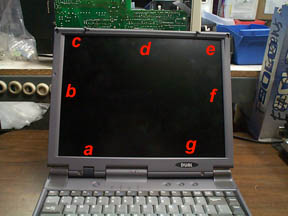
3. Once the screws have been removed, gently unclip the front LCD bezel in a clockwise manner, starting from the lower left, (a), (b), (c), (d), (e), (f) and (g).


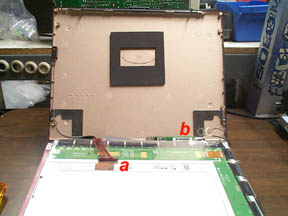
4. Once the bezel has been removed, disconnect the (a) LCD data cable and (b) bulb cable from the actual display.


5. Identify markings for the make and model of the LCD display, here, LG Phillips LP141X2